Dodge & Burn and Retouching Teeth
Lesson 7 from: Lightroom for Portrait PhotographersKristina Sherk

Dodge & Burn and Retouching Teeth
Lesson 7 from: Lightroom for Portrait PhotographersKristina Sherk
Lessons
Lesson Info
Dodge & Burn and Retouching Teeth
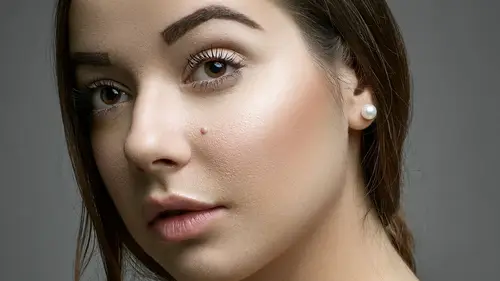
So she has really, really nice highlights and shadows already. So I probably wouldn't change that. But here, we've got a little bit of a more flat complexion. And I'd like to add a little bit of dimension to her skin as it is. Are we thirty minutes in or thirty minutes? Until we break. Until we break, okay. So let's go ahead and come into our develop module. The next brush that I'm gonna use is actually a brush that comes by default in Lightroom, and that is going to be your Dodge brush. It's your Dodge Lighten brush but the only thing that I'm going to change is that I'm going to increase the exposure from 25 to a little bit stronger. But then what I'm gonna do is bring down my flow a little bit so that I can add slightly the areas. So a lot of people are probably under the impression that you wouldn't necessarily be able to dodge and burn in Lightroom, right? If you think about dodging and burning as a concept all it is is brightening and darkening. So you can dodge and burn in a...
nything. Okay, Lightroom and Photoshop as well. So the only change that I'm doing is lightening these certain areas. I'm just gonna lighten right along the bridge of the nose and lighten up those cheekbones and really center the eye of the viewer. If you've ever watched a makeup artist contour when they're applying makeup, they're doing the same thing as dodge and burn. They're basically brightening certain areas and darkening other areas. So let's go to the before and the after. Just gives a little bit of illumination to the face, right? So that's something that you can easily do in Lightroom as well. Let's talk about teeth. So I'm glad that I already kind of talked to you guys about the color wheel because we're going to talk about cleaning up teeth and making them look a little bit less yellow. So if I come to my adjustment brush again, which is K, K is the quick key for adjustment brush. And I come to my whiten teeth brush, you will also get the you will get the Screengrab to whiten teeth as well. Where is it? Is it in? Mouth? I'm super dyslexic so lists of words is my worst nightmare. Lips, Mouth, Teeth. Okay so, I decrease the saturation slightly, I color, I took the color balance away from yellow and more towards blue to neutralize that yellow tone but then I also added a slight blue color to paint over the yellow to neutralize those teeth as well. This is gonna be the one situation when I brighten teeth that I use automask. Until Lightroom (coughs) I hope they're listening, until Lightroom has a feather-slider for the automask I rarely use automask when I'm painting something in because I think the line between visible and not visible for that effect is way too stark and way too contrasty. So until they feather that, I don't use automask a lot. So if I turned on automask and I come and I paint in here the only areas where this effect is going to be visible is the area that you hover the Crosshairs over. As soon as you take those Crosshairs and cover and hold them over something- Is this working? Okay, yes, but very slow. Okay, let's increase these settings. Add a little bit more blue. As soon as you hover this effect over another area your effect is going to be visible on that other color. So as long as you keep the plus mark over the area that you want the effect to be applied to, you should be good. Let's see if we, that's going to bring out that mask. So you can see that it did a pretty good job of keeping that teeth whitening in the area of the teeth and not bleeding it over. We do have a little bit of bleed right here, so I'll hold down Option and come back and paint over that gum so it doesn't go too far. Alright, so before, after, before, after. Still a little bit extreme for that teeth whitening so we'll come to our disclosure arrow and back it off. I love this little disclosure arrow thing. Okay, before and after.
Class Materials
Free Bonus Material
Ratings and Reviews
Cheryl Jones Schindler
This is an excellent class. I have covered over half of BenWilmore's complete guide to Lightroom, which I needed as I have mostly played around with the obvious sliders in Lightroom until now. So fortunately I had a little familiarity with brushes. This is so helpful for me to now use what I learned with more detail and more skills specifically for portraits of my family. I am so excited to use all this! Thanks!!!! She is an excellent teacher.
Lesa Wright
I very much appreciated Kristina's energy and concise instruction. She was very easy to follow and remained focused on each lesson without being repetitive or random. I learned great time saving tips that will not be difficult to implement. Thank you, Kristina!
Stacey Feasel
This was a fantastic, easy to follow course! So glad I took it!!!
Student Work
Related Classes
Adobe Lightroom