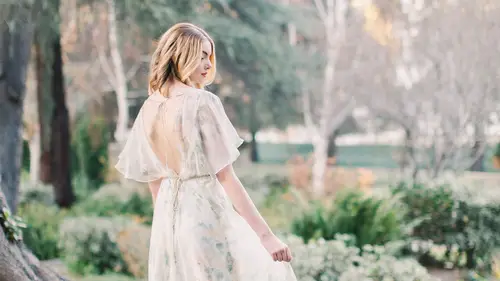
Live Edit: Editing the Live Shoot
Lesson 9 from: Capture and Create Artistic Wedding PortraitsCaroline Tran

Live Edit: Editing the Live Shoot
Lesson 9 from: Capture and Create Artistic Wedding PortraitsCaroline Tran
Lesson Info
9. Live Edit: Editing the Live Shoot
Lessons
Class Introduction
03:15 2Why Care About the Film Look?
03:48 3What is the Film Look?
03:59 4Tips to Achieve the Look of Film with Digital
19:22 5Live Shoot: Bridal Portraits
47:44 6Introduction to Editing for the Film Look
07:42 7Using Photo Mechanic to Cull
10:02 8Live Edit: How I Get the Film Look
38:30Lesson Info
Live Edit: Editing the Live Shoot
So let's get this a little bit brighter. This one, I like her really slick black hair, but I'm wondering if I should get a little bit more details in it. Okay, so, I wanted to touch upon that match tonal exposure that I was telling you about, so when you're syncing, so you did one studio shoot, the lighting is all kinda the same, what I find best for matching tonal exposure, is if you pick it roughly about the same amounts of blacks and whites, cause I think that's what it's trying to match for, right? So for example, if I choose just the ones where it's half body, then it's the same amount of whites versus blacks, if you think about ratio in the picture. If I suddenly move it to full-body, now there's way more whites in it, and the blacks are a lot more little, so then I feel like it's not as accurate when it's trying to match the tones. And so, once I get It to look like this, I would sync it, oh, and when I sync, Let me get that back up again. I typically keep most of it on, the onl...
y one that I uncheck is spot removal and crop. Unless I was actually on a tripod. If I was on a tripod then you know that whatever you're moving is exactly there, right? But if it's not then you're better off leaving that off, and so I would sync everything else except for that. And then, there we go. Alright, so now let's take a look at, I want to find one that looks really filmy to me. So this one is, I find that the more depth of field I'm able to give it, the more blur, the more filmy it looks. So, I remember we ended up pulling her away from the screen, the backdrop a little bit. This was that experiment that we did, where I was trying, turning her into the light versus away from the light, so, I was actually wrong on this one, I prefer her face into the light for this one. That other one that I showed you, with the other very Chinese bride, in the Chinese thing, I think that one probably because the highlights was a lot brighter, that one I felt like it almost made it too bright when she was looking into the light and I preferred it when she looked away. I think it's a lot more softer in here, and it's not as contrasty in here, so that's why, I'm not happy with that, like her face looks really... And I guess, looking at this, it looks like it's cooler light facing on the inside as well. So with this one we could try going... brightening it up halfway with the gradient tool, and then maybe even only partially warming it up. We were warming it up on this side, but I don't want, don't make the highlights any brighter. There, and then I can just tone everything down just a tad, as well. I want to get to some of the, oh you can see what happened with matching tonal exposure when I switched it to the full body versus the close-up. It didn't match the tones very well, right? That one you would have to go manually, go in and fix that one. Yeah, I think what makes this look like a film image is her pretty skin tone on here, the softness of it, I think the colors, the soft neutral palette, and then the fact that the highlights aren't blown out on here, you can still see the details in her dress, you can still see the details, the patterns, in Quinn's backdrop, too, without it being blown out. Yeah, look, you can still see all of the non-steamed, the wrinkles in the dress. So thank you to Fujifilm, which was the camera that I used, and then Refined Presets, for what I use everything to edit with now, Pink & Posey for this gorgeous backdrop and little props, and then PhotoMechanic, who I call all my images with, and then Jean & Jewell, who provided that gorgeous gown.
Ratings and Reviews
JennMercille
Caroline Tran is bursting with creative energy and enthusiasm! In this class she walks you through the little differences between film and digital that separate the SOOC of the two. She shows you how understanding what makes them different is the cornerstone to learning how to manipulate digital to mimic film. All you need is a working knowledge of manual mode, and a willingness to let go of go-to DSLR habits that keep your images distinctly digital. She finishes with walking you through the simplest post-production that doesn't even require a strong knowledge of Lightroom. She even sells her presets if you don't want to recreate them on your own. This class was wonderful and so much fun! Thank you Caroline!
Student Work
Related Classes
Portrait Photography