Brush Shape for Cleanup
Lesson 5 from: Beginner Content Aware and Clone Techniques in PhotoshopTim Grey

Brush Shape for Cleanup
Lesson 5 from: Beginner Content Aware and Clone Techniques in PhotoshopTim Grey
Lessons
Class Introduction
01:56 2Overview of Cleanup Tools in Photoshop
11:29 3Tips for Non-Destructive Workflow
08:48 4Using the Clone Stamp Tool
18:16 5Brush Shape for Cleanup
03:24 6Using the Healing Brush Tool
06:56 7Speedy Cleanup with the Spot Healing Brush Tool
04:29 8Cleaning on a Path
04:21Lesson Info
Brush Shape for Cleanup
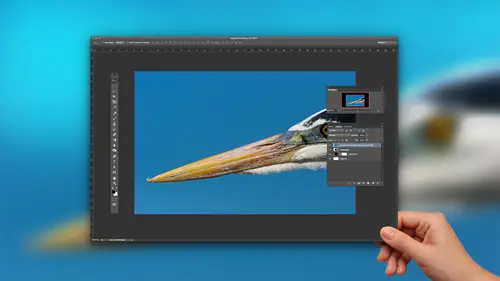
one additional option related to the use of the clone stamp tool. And that is the ability. And really, this relates to all of the other tools as well. But the ability to change the shape of the brush so that if we need to get into a little nook or cranny in our image, we can do that very easily. So we're just gonna kind of blend in a little bit more of this red in this image. Most members using this as a visual example to show you how we can get that brush into a tiny little nook or cranny. Now, in theory, I would just make that brush really, really small. So I'm gonna get rid of some of this. I feel like it's excessive black paint along this little corner here, so I want to clean that up so I can use a tiny little brush and work. One picks a little time. Problem is, I'm lazy, and I don't want to use a tiny little brush and change one pixel at a time, so instead I'd rather use a larger brush. So let's bring up the brushes panel over that other button up there on the options bar that we...
sort of glossed over all. Click that button and you'll see that we have a bunch of settings related to the brush, which mostly the settings air helpful for the actual brush tool. But they also apply to the Clone Stamp tool, which is a brush tool. It's just a fancy brush tool were able to copy pixels, and what we're gonna focus our attention on are the angle and roundness settings. I'm gonna click on the roundness value just that that number is highlighted, and then so you can see what's actually happening. I'm gonna move my mouse back out into the image area, and I'm going to change the value. So once I've clicked into a numeric field inside a photo shop, I can use the arrow keys on the keyboard to alter that value so I can use the down arrow arrow key to reduce the value or the up arrow key to increase the value. And I can add this shift key, which in most cases increases or decreases by a factor of 10. So I'm going in 1% increments, for example, with the up and down arrow keys or I can add, shift and go up and down in 10% increments. Look at the size and shape of my brush. It's getting squished. So now I've got a longer, skinnier brush that will be able to get into nooks and crannies much more easily. But wait, there's more if you order in the next five minutes, in addition to the roundness center, you will also get the angle settings. I'll click my mouse into the angle value to highlight that, and now I can use those arrow keys once again. Oh my goodness, it's hard to believe, but it's really true. We can rotate that brush around so that we can have it at a specific angle. And, of course, as we're working, we can change that angle at will. Now, this is something that's especially helpful when we're doing really more advanced retouching techniques touching up a person's face, for example. But you will find in a variety of situations when you need to get into a little nook or cranny. If I set that source and then come painting into that area of the image, I'm able to get right down into a little area of the photo again, adjusting that round the setting to squish the brush as needed and then using the angle to rotate the brush. So I get exactly where I need much more easily. And it's a lot easier than zooming in and using a teeny tiny little brush when you've got some fine detail toe work on in the photo.
Class Materials
Bonus Materials with Purchase
Ratings and Reviews
Linda Cook
Tim is terrific. He is so clear & helpful
Dyan Bone
Tim was an excellent presenter and spoke very clearly with precision about exactly what he was doing and where he was going with the work. He covered a lot of information but did not go too fast so people like me at home could keep up with it while I was doing the same thing in my lightroom, etc... Also, he made it very clear almost every time where the tools were at in the menu bar and shortcut keys in MAC and the PC as he was moving along in his presentation. He did this without losing time and was able to cover everything that was necessary. I hope you all can have him present more topics as he made learning a lot easier to follow than some of the other presenters.
Student Work
Related Classes
Adobe Photoshop